Introduction
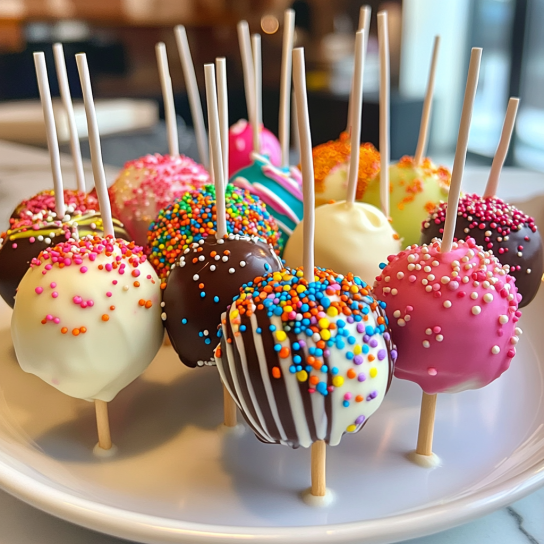
Cake pops are a delightful treat that combines the best of cake and candy in one bite-sized creation. Popularized by Starbucks, these tiny desserts are perfect for satisfying sweet cravings while being incredibly portable and customizable. In this article, we’ll dive into a detailed, step-by-step guide on how to recreate Starbucks-style cake pops in the comfort of your own kitchen.
This recipe will cover everything from the essential ingredients and tools to advanced tips and tricks for making the perfect cake pops. Whether you’re a beginner or a seasoned baker, you’ll find this guide helpful for achieving that perfect Starbucks-quality result.
What Are Starbucks Cake Pops?
Origins of the Starbucks Cake Pop Recipe
The Starbucks Cake Pop Recipe is inspired by the traditional cake pop, a creative dessert originally designed to repurpose leftover cake into bite-sized treats. This innovative concept took off when Starbucks introduced their signature cake pops to the world in 2011. Known for their delightful flavor and aesthetic appeal, Starbucks cake pops quickly became a fan favorite.
Why the Starbucks Cake Pop Recipe Is So Popular
The Starbucks Cake Pop Recipe owes its popularity to a combination of factors: the perfect balance of texture, the rich and moist cake center, and the smooth, candy-like coating. Their visual appeal, with designs ranging from simple sprinkles to seasonal themes, makes them stand out in coffee shops and on social media.
What sets the Starbucks Cake Pop Recipe apart is its versatility. These miniature desserts can be customized to suit any occasion or flavor preference, making them a staple for birthdays, holidays, and everyday indulgence. Recreating this recipe at home allows you to enjoy the same quality and charm while adding your personal touch.
Ingredients Overview
Recreating the Starbucks Cake Pop Recipe at home requires the right combination of ingredients to achieve the same moist, flavorful interior and crisp, smooth coating. Below, we break down the components needed for the cake base, frosting, and coating.
Cake Base Ingredients
The foundation of the Starbucks Cake Pop Recipe is a moist and rich cake, typically vanilla or chocolate. You can use a homemade cake recipe or a boxed cake mix for convenience. Here’s what you’ll need:
- 1 Box of Cake Mix (or homemade equivalent): Choose your preferred flavor, such as vanilla, chocolate, or red velvet.
- Eggs: Follow the cake mix instructions (usually 2-3 eggs).
- Vegetable Oil: Adds moisture and richness (usually 1/3 cup).
- Water or Milk: As required by the cake mix instructions.
Optional: Add a teaspoon of vanilla extract or a hint of almond extract to enhance the flavor.
Frosting Ingredients
The frosting is the binding agent that holds the crumbled cake together, creating the signature dense texture of a cake pop. For the Starbucks Cake Pop Recipe, buttercream or cream cheese frosting works best.
- 1/3 to 1/2 Cup of Frosting: Adjust based on the moisture of your cake crumbs.
- Buttercream Frosting (Homemade or Store-Bought): Vanilla or chocolate flavor, depending on your cake.
- Optional Flavor Additions: A dash of cocoa powder for chocolate cake or lemon zest for vanilla cake.
Coating and Decoration
The outer shell of the cake pop is a candy coating that provides a smooth finish and protects the cake. Here’s what you’ll need:
- Candy Melts or White Chocolate Chips: Use candy melts in various colors or white chocolate for a customizable coating.
- Vegetable Shortening or Coconut Oil: To thin the melted candy for easier dipping (about 1-2 teaspoons).
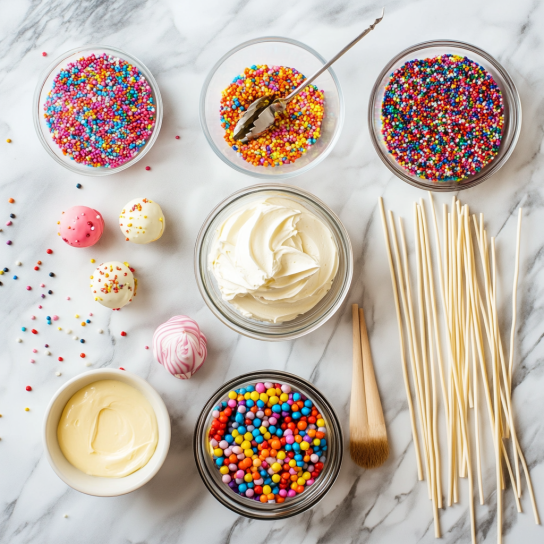
- Lollipop Sticks: Available at craft or baking supply stores.
- Sprinkles or Decorations: Choose fun colors, shapes, or seasonal designs to mimic the Starbucks look.
With these ingredients in hand, you’re ready to dive into the steps to create your very own Starbucks Cake Pop Recipe at home!
Tools Needed for Making the Starbucks Cake Pop Recipe
Creating the perfect Starbucks Cake Pop Recipe at home is easier when you have the right tools on hand. While some items are standard kitchen tools, others are specific to cake pop preparation. Here’s a detailed breakdown of what you’ll need.
Essential Baking Tools
The basic tools for baking the cake base and preparing the cake pops include:
- Mixing Bowls: At least two bowls for mixing the cake batter and frosting the cake crumbs.
- Hand Mixer or Stand Mixer: Ensures a smooth batter and creamy frosting.
- Baking Pan: Follow the size instructions on the cake mix box (typically 9×13 inches).
- Cooling Rack: Allows the cake to cool evenly before crumbling.
- Measuring Cups and Spoons: Ensures precision in ingredient quantities for consistent results.
Specialty Tools for Cake Pops
These tools are specifically designed for making cake pops and are essential for recreating the Starbucks Cake Pop Recipe:
- Lollipop Sticks: Necessary for the signature cake pop presentation. Look for durable sticks that can hold the weight of the cake.
- Cookie Scoop or Small Ice Cream Scoop: Helps portion the cake mixture evenly for uniform cake pops.
- Cake Pop Mold (Optional): Ideal for beginners to achieve perfectly round shapes.
- Styrofoam Block or Cake Pop Stand: Allows the dipped cake pops to dry upright without smudging the coating.
- Silicone Spatula: For scraping down mixing bowls and working with melted candy.
- Microwave-Safe Bowls: For melting candy melts or chocolate coating.
Tips for Choosing the Right Tools
- Invest in Quality: Sturdy lollipop sticks and reliable baking tools make a noticeable difference in your final results.
- Reusable Options: Silicone molds and non-stick baking pans are eco-friendly and cost-effective for repeated use.
- Organized Workspace: Arrange your tools and ingredients beforehand to streamline the cake pop-making process.
With these tools at your disposal, you’re well-equipped to follow the next steps in crafting your own Starbucks Cake Pop Recipe.
Step-by-Step Preparation
The magic of Starbucks Cake Pop Recipe lies in their rich texture, achieved by blending crumbled cake with creamy frosting. Follow these steps carefully to prepare the base for your Starbucks-inspired cake pops.
Preparing the Cake Base
- Bake the Cake:
- If using a boxed mix: Follow the package instructions to bake your chosen cake flavor.
- If making homemade cake: Use your favorite recipe for vanilla, chocolate, or another preferred flavor. Ensure the cake is baked in a flat, even layer to allow for consistent crumbling.
- Let the cake cool completely before handling it. A warm cake will crumble unevenly and may affect the texture.
- Crumble the Cake:
- Break the cooled cake into small chunks.
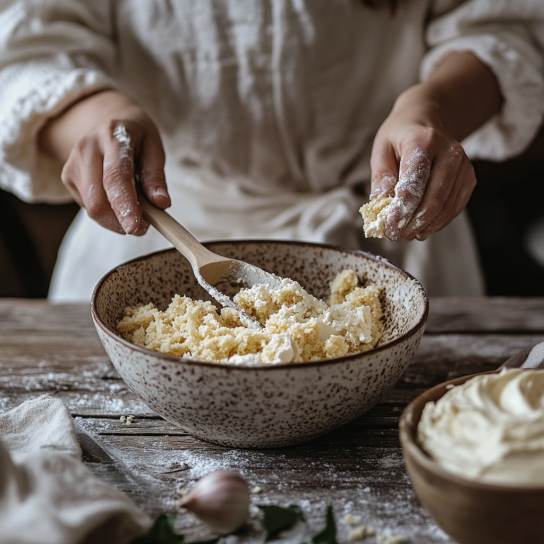
- Use your hands to crumble the cake into fine, even crumbs. Alternatively, a food processor can speed up the process.
- Check for Moisture:
- Ensure the crumbs are moist but not overly wet. Dry crumbs may need additional frosting later.
Making the Frosting
- Cream Cheese Frosting:
- Beat 4 ounces of cream cheese with 1 cup of powdered sugar until smooth.
- Add 1 teaspoon of vanilla extract for flavor.
- Buttercream Frosting:
- Combine ½ cup of softened butter with 1½ cups of powdered sugar.
- Add 1–2 tablespoons of milk and a splash of vanilla extract to achieve a creamy consistency.
Combining the Cake and Frosting
- Mix the Crumbs and Frosting:
- In a large bowl, add the frosting to the cake crumbs a little at a time. Start with about ¼ cup of frosting and gradually increase as needed.
- Mix thoroughly using your hands or a spatula. The mixture should be moist enough to hold its shape when pressed but not overly sticky.
- Test for Consistency:
- Roll a small amount of the mixture into a ball. If it holds together without cracking, the consistency is perfect.
- If the mixture is too dry, add a teaspoon of frosting. If too wet, add a small amount of extra cake crumbs.
Chill the Mixture
- Refrigerate Before Shaping:
- Cover the bowl with plastic wrap and refrigerate the mixture for 1–2 hours. Chilling makes the mixture firmer and easier to shape into cake pops.
- If you’re short on time, place the mixture in the freezer for 20–30 minutes instead.
- Prepare Your Workspace:
- While the mixture chills, gather your lollipop sticks, candy melts, and any desired toppings.
Once the mixture is firm and ready to handle, it’s time to shape and form the cake pops. The next section will cover techniques and tips for creating perfectly round and uniform cake pops.
Shaping and Forming Cake Pops
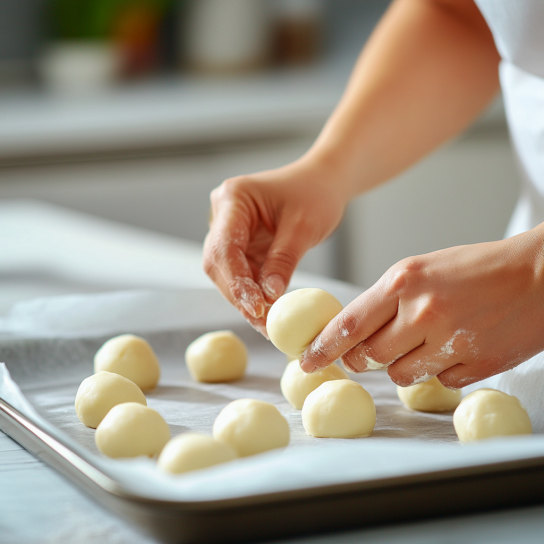
Creating perfectly round and uniform cake pops is an essential step in achieving a professional-looking result. This section will guide you through the shaping process and provide tips for precision.
Techniques for Shaping Cake Pops
- Divide the Mixture Evenly:
- Use a small cookie scoop or tablespoon to portion out the cake mixture. This ensures all cake pops are of uniform size, which helps them cook and coat evenly.
- Roll into Balls:
- Take one portion at a time and roll it between your palms to form a smooth ball.
- If cracks appear, gently press the mixture together before re-rolling.
- Size Consistency:
- Aim for balls that are about 1 inch in diameter, roughly the size of a golf ball. Larger cake pops may be too heavy for the stick, while smaller ones may dry out.
Adding the Sticks
- Melt a Small Amount of Coating:
- Melt a small portion of your candy melts or chocolate (about 2 tablespoons) in the microwave in 15-second intervals, stirring until smooth.
- Insert the Sticks:
- Dip the tip of each lollipop stick into the melted coating, then insert it about halfway into a cake ball. This acts as a “glue” to secure the stick.
- Chill Again:
- Place the cake pops upright on a lined baking sheet or in a styrofoam block. Refrigerate for 15–20 minutes to allow the coating to set and secure the sticks.
Tools Needed for Precision
- Lollipop Sticks:
- Ensure you have sturdy lollipop sticks to support the weight of the cake pops.
- Styrofoam Block or Cake Pop Stand:
- Use a styrofoam block or cake pop stand to hold the pops upright during the chilling and decorating stages.
- Cookie Scoop:
- A small cookie scoop helps achieve uniform sizes for consistent results.
Troubleshooting Common Issues
- Cracks in Cake Pops:
- If the mixture cracks while shaping, it might be too dry. Add a small amount of frosting to adjust the consistency.
- Sticks Falling Out:
- Ensure the coating used to attach the stick is fully set before moving to the coating stage.
- Uneven Shapes:
- Roll the mixture between your hands longer for smoother, more even spheres.
Now that your cake pops are shaped and ready, it’s time for the exciting part—coating and decorating them to perfection. The next section will cover how to melt your coating, dip the pops, and add creative decorations.
Coating and Decorating
The coating and decorating stage is where your cake pops come to life, transforming them into delightful treats that look as good as they taste. This section covers the process of melting the coating, dipping the cake pops, and adding decorative touches to achieve a professional finish.
Preparing the Coating
- Melt the Candy Melts or Chocolate:
- Place your candy melts or chocolate chips in a microwave-safe bowl.
- Heat in 15-second intervals, stirring after each interval, until fully melted and smooth. Avoid overheating, as this can cause the coating to seize.
- Add Coconut Oil (Optional):
- To achieve a thinner, smoother consistency, stir in 1–2 teaspoons of coconut oil or vegetable shortening. This step is particularly helpful when working with chocolate chips.
- Keep the Coating Warm:
- Work quickly to coat the cake pops before the mixture begins to cool and harden. You can place the bowl over a warm water bath to keep it at a workable temperature.
Dipping the Cake Pops
- Dip the Cake Pops:
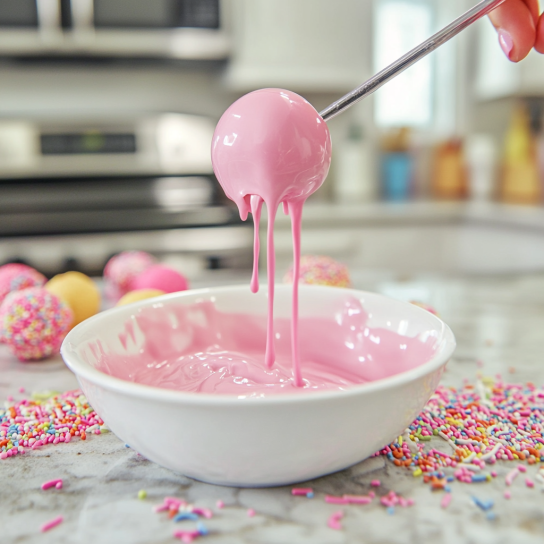
- Hold the cake pop by the stick and dip it into the melted coating, ensuring the entire ball is submerged.
- Gently lift the pop out of the coating and tap the stick against the side of the bowl to remove excess coating. Rotate the pop to maintain a smooth, even layer.
- Avoid Over-Dipping:
- Too much coating can weigh down the cake pop and cause it to slide off the stick.
- Place Upright to Dry:
- Insert the stick into a styrofoam block or cake pop stand to allow the coating to dry and harden completely.
Decorating the Cake Pops
- Add Toppings While Wet:
- Quickly sprinkle on decorations like sprinkles, crushed nuts, or edible glitter before the coating dries.
- For intricate designs, use tweezers to place decorations precisely.
- Drizzle with Chocolate:
- Melt a contrasting color of chocolate or candy melts.
- Use a piping bag or a spoon to drizzle thin lines over the coated cake pops for a decorative effect.
- Create Themed Designs:
- Use edible markers, fondant shapes, or molds to create designs for specific themes, such as birthdays, holidays, or seasonal events.
Let the Cake Pops Set
- Chill the Pops:
- Once decorated, place the cake pops in the refrigerator for 15–20 minutes to ensure the coating is fully set.
- Check for Imperfections:
- After chilling, inspect the cake pops for any cracks or uneven spots in the coating. Touch up any flaws with a small amount of melted coating.
Advanced Tips for Decorating
- Use Multiple Colors:
- Divide your candy melts into separate bowls and use food coloring to create a variety of hues for multi-colored cake pops.
- Use Molds for Shapes:
- For unique designs, press the cake mixture into silicone molds before coating.
- Add Personal Touches:
- Personalize your cake pops with initials, names, or custom designs using icing or edible paint.
Once your cake pops are coated and decorated, they’re nearly ready to serve. In the final section, we’ll discuss how to store them properly and share creative ways to present your homemade treats.
Tips for Perfect Cake Pops
Creating cake pops that are not only delicious but also visually stunning requires a bit of finesse. Here are expert tips to ensure your Starbucks-inspired cake pops turn out perfectly every time.
Avoiding Common Issues
- Prevent Cracks in the Coating:
- Ensure the cake balls are at room temperature before dipping them in the warm coating. Extreme temperature differences can cause cracks.
- Smooth and Even Coating:
- Stir the melted candy coating frequently to maintain a consistent temperature and prevent lumps.
- Securing the Stick:
- Dip the stick into the coating before inserting it into the cake ball to create a strong bond.
Storage Tips
- Short-Term Storage:
- Store cake pops in an airtight container at room temperature for up to 2 days.
- Long-Term Storage:
- For longer storage, place the cake pops in a single layer inside a freezer-safe container. Freeze for up to 2 months. When ready to enjoy, let them thaw in the refrigerator overnight.
- Protect the Decorations:
- Avoid stacking cake pops with delicate decorations to prevent smudging.
Serving Suggestions
Cake pops are versatile treats that can be styled to fit any occasion. Here are some creative ideas for serving and presenting them:
Presentation Ideas
- Cake Pop Stand:
- Use a decorative stand to display the pops upright, making them a centerpiece for parties or events.
- Gift Wrapping:
- Wrap each cake pop in clear cellophane and tie it with a ribbon for party favors or holiday gifts.
- Arranged Bouquets:
- Arrange cake pops in a floral foam base to create a cake pop bouquet for special celebrations.
- Pairing with Beverages:
- Serve cake pops with coffee, tea, or hot chocolate for a delightful pairing
FAQs About Starbucks Cake Pops
What are Starbucks cake pops made of?
- Answer: Starbucks cake pops are made from a combination of crumbled cake and frosting, shaped into a ball or other creative forms, and coated in a smooth candy shell. They are often decorated with sprinkles or drizzle to enhance their visual appeal.
Does Starbucks have vanilla foam?
- Yes, Starbucks offers vanilla-flavored foam, typically used in beverages like the Vanilla Sweet Cream Cold Brew. This foam is made from their signature Vanilla Sweet Cream, which is frothed to create a rich, velvety texture.
What is on the outside of a Starbucks cake pop?
- The outside of a Starbucks cake pop is coated in a smooth candy shell made from melted candy melts or chocolate. This coating not only adds sweetness but also gives the cake pops their firm, shiny exterior.
What is the inside of a cake pop made of?
- The inside of a cake pop is a soft mixture of cake crumbs and frosting. The texture is moist and rich, which contrasts perfectly with the firm outer coating.
Are Starbucks cake pops supposed to be doughy?
- Yes, Starbucks cake pops are slightly doughy because the cake is mixed with frosting to create a dense, moist texture. This is intentional and gives the cake pops their rich flavor and signature consistency.
What is cake foam made of?
- Cake foam refers to the airy, spongy structure of baked cake, achieved through the incorporation of air into the batter. This is typically done by beating eggs or using leavening agents like baking powder. Cake foam forms the base before it is crumbled and mixed with frosting for cake pops.
Conclusion
Making Starbucks-inspired cake pops at home is a rewarding and fun baking project. With the right ingredients, tools, and techniques, you can create delicious treats that look professional and taste even better than store-bought versions. Whether for a celebration, a gift, or just a sweet indulgence, these cake pops are sure to impress. So gather your supplies, unleash your creativity, and enjoy the process of crafting these delightful desserts!
If you enjoyed making these pops, try our Oreo Mug Cake or the moist Banana Cake Mix Recipes. For a nutty treat, don’t miss our Almond Nut Cake.
