Introduction
Butterfinger cake recipe is a decadent dessert that combines the richness of a moist chocolate cake with the iconic crunch and flavor of Butterfinger candy bars. This cake is an indulgent treat perfect for birthdays, holidays, or whenever you want to satisfy your sweet tooth. Easy to make and even easier to enjoy, Butterfinger cake layers delightful textures and flavors, making it a favorite among dessert lovers.
What is Butterfinger Cake?
Butterfinger cake is a dessert that takes inspiration from the classic Butterfinger candy bar, known for its crispy, peanut-buttery center coated in rich chocolate. This cake is a creative way to incorporate the candy’s signature crunch and flavor into a dessert, resulting in a treat that’s as indulgent as it is unique.
The Origins of Butterfinger Cake
While there’s no definitive origin story for Butterfinger cake, it likely emerged as a result of home bakers seeking creative ways to use their favorite candy in desserts. Over the years, the recipe has gained popularity at potlucks, parties, and family gatherings, earning a reputation as a crowd-pleasing treat.
Why It’s a Favorite for Candy Lovers
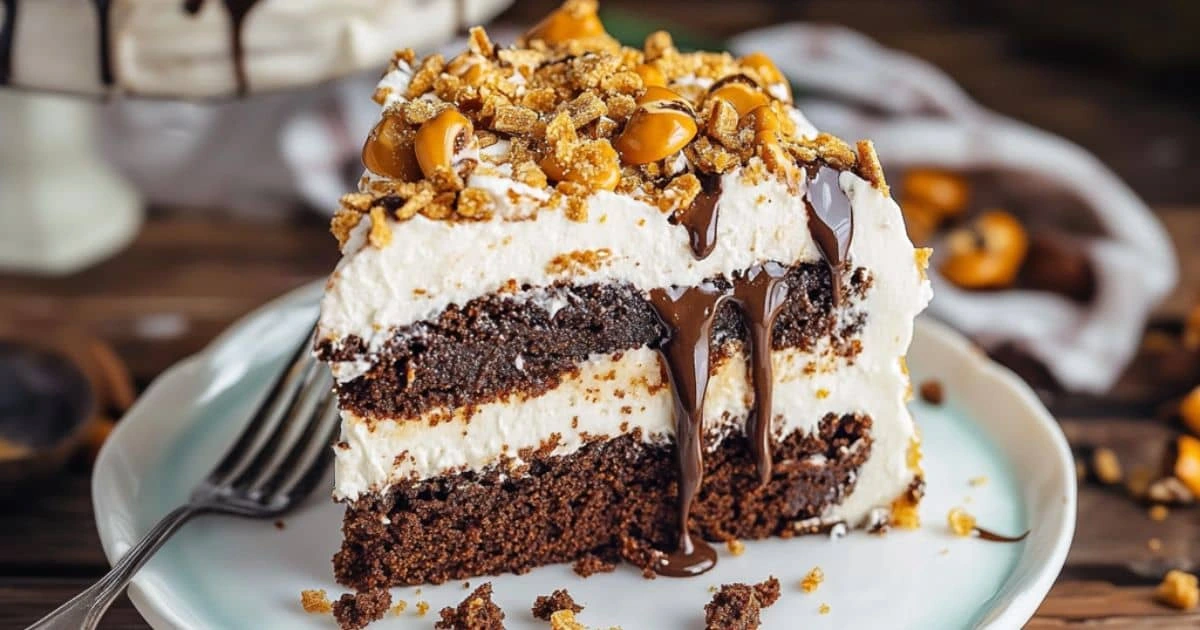
- Layered Flavors: Butterfinger cake combines the richness of chocolate cake, the creaminess of caramel and whipped topping, and the crunch of Butterfinger candy, creating a multi-dimensional dessert.
- Easy to Make: With simple ingredients and steps, it’s an accessible recipe for both novice and experienced bakers.
- Customizable: The recipe can be easily adapted with different flavors and toppings to suit individual preferences.
Ingredients for Butterfinger Cake
Creating a Butterfinger cake is simple and requires ingredients that are easy to find. Here’s a breakdown of what you’ll need, along with tips for choosing the best products for your recipe.
Core Ingredients and Their Purpose
- Cake Base:
- 1 box of chocolate cake mix (any brand).
- Ingredients listed on the box, such as eggs, oil, and water.
- Filling and Topping:
- 1 can (14 oz) of sweetened condensed milk.
- 1 jar (12 oz) of caramel sauce.
- 4–6 Butterfinger candy bars, crushed.
- 1 tub (8 oz) of whipped topping (e.g., Cool Whip).
Recommended Brands or Substitutes
- Cake Mix: Duncan Hines and Betty Crocker are popular choices, but any chocolate cake mix will work. For a homemade option, use a simple chocolate cake recipe.
- Caramel Sauce: Look for high-quality caramel, such as Ghirardelli, for a richer flavor.
- Butterfingers: Full-size or fun-size candy bars both work; just ensure they’re crushed finely for even distribution.
- Whipped Topping: Cool Whip is the go-to choice for convenience, but you can use freshly whipped cream for a homemade touch.
Optional Add-Ins for Extra Flavor
- Peanut Butter Drizzle: Add melted peanut butter between layers for an extra nutty flavor.
- Chocolate Chips: Sprinkle mini chocolate chips over the whipped topping for added texture.
- Vanilla Extract: Add a teaspoon to the cake batter for enhanced flavor.
Tips for Crushing Butterfingers
- Place the candy bars in a zip-top bag and crush them with a rolling pin or a meat mallet.
- For less mess, chill the candy bars in the freezer for 15 minutes before crushing.
Step-by-Step Instructions
Making Butterfinger cake involves layering rich flavors and textures to create a dessert that’s both indulgent and easy to assemble. Follow these steps for a perfect result.
Preparing the Cake Base
- Preheat the Oven: Set your oven to the temperature specified on the cake mix box (typically 350°F or 175°C).
- Mix the Batter: In a large mixing bowl, combine the cake mix with the eggs, oil, and water as instructed on the box. Mix until smooth and free of lumps.
- Bake the Cake: Pour the batter into a greased 9×13-inch baking dish. Bake according to the package instructions, usually 28–35 minutes, or until a toothpick inserted in the center comes out clean.
- Cool the Cake: Allow the cake to cool for 10–15 minutes, but not completely, as it’s easier to work with when slightly warm.
Adding the Butterfinger Layer
- Poke Holes in the Cake: Use the handle of a wooden spoon or a skewer to poke holes evenly across the surface of the warm cake. Space the holes about 1 inch apart.
- Pour the Filling: In a bowl, mix the sweetened condensed milk and caramel sauce. Slowly pour the mixture over the cake, focusing on filling the holes to ensure the flavor seeps into every bite.
- Sprinkle Butterfingers: Crush 2–3 Butterfinger bars and sprinkle them over the cake, allowing the candy to stick to the caramel-milk mixture.
Whipping Up the Topping
- Spread the Whipped Topping: Once the cake has cooled completely, spread an even layer of whipped topping over the surface. Use a spatula to smooth it out.
- Add Crushed Butterfingers: Crush the remaining Butterfinger bars and sprinkle them generously over the whipped topping for decoration and added crunch.
Assembling and Serving
- Chill the Cake: Refrigerate the assembled cake for at least 2 hours. This allows the flavors to meld and makes the cake easier to slice.
- Serve: Cut the cake into squares and serve chilled or at room temperature.
Tips for Success
- Layer Strategically: Reserve some Butterfinger crumbs for garnish right before serving for a fresh, crunchy topping.
- Cool Completely: Ensure the cake is fully chilled before slicing to avoid a messy presentation.
- Use a Sturdy Dish: The cake can be heavy due to its layers, so a sturdy baking dish is essential for support.
Customizing Your Butterfinger Cake
Butterfinger cake is a versatile dessert that can be easily customized to suit your preferences. From adding different candies to exploring new flavor combinations, here are some creative ways to make this recipe your own.
Adding Different Candies
- Snickers: Replace or mix Butterfingers with crushed Snickers bars for a nougat and caramel twist.
- Reese’s: Use Reese’s Peanut Butter Cups for a creamy peanut butter flavor.
- Heath Bars: Add Heath toffee bits for an extra crunch and buttery sweetness.
- M&Ms: Sprinkle mini M&Ms over the whipped topping for a colorful and festive variation.
Frosting Variations
- Chocolate Ganache: Replace the whipped topping with a layer of smooth chocolate ganache for a rich and glossy finish.
- Peanut Butter Frosting: Whip peanut butter, butter, powdered sugar, and a splash of milk for a nutty topping that pairs perfectly with Butterfingers.
- Cream Cheese Frosting: Add a tangy cream cheese frosting as a base layer beneath the crushed Butterfingers for a unique flavor combination.
Adjusting for Dietary Preferences
- Gluten-Free Option: Use a gluten-free chocolate cake mix and confirm that your Butterfingers are gluten-free (some varieties may contain traces of gluten).
- Dairy-Free Version: Substitute plant-based sweetened condensed milk, non-dairy whipped topping, and a dairy-free chocolate cake mix.
- Sugar-Free Variation: Use sugar-free caramel sauce and sugar-free whipped topping, and replace Butterfingers with a low-sugar candy option.
Creative Presentation Ideas
- Layered Parfait: Create individual Butterfinger cake parfaits by layering cake pieces, caramel, whipped topping, and crushed candy in clear glasses.
- Cupcake Style: Prepare the cake batter in a muffin tin and top each cupcake with caramel, whipped topping, and crushed Butterfingers for individual servings.
- Birthday Variation: Add candles, sprinkles, or a decorative chocolate drizzle to make the cake party-ready.
Tips for the Perfect Butterfinger Cake
Crafting a Butterfinger cake that is both flavorful and visually appealing requires attention to detail. These tips will help you achieve the best results every time.
Maintaining the Perfect Texture and Flavor
- Don’t Overbake: Follow the cake mix instructions carefully and avoid overbaking, as a dry cake won’t absorb the filling properly. Use a toothpick to test for doneness.
- Even Filling Distribution: Pour the caramel and condensed milk mixture slowly and evenly to ensure it seeps into the holes without pooling on the surface.
- Keep it Fresh: Add the crushed Butterfinger topping just before serving to maintain its crunch and prevent it from becoming soggy in the refrigerator.
Preventing Candy from Becoming Soggy
- Chill Before Topping: Ensure the cake is completely cool before adding the whipped topping and crushed Butterfingers. This prevents condensation, which can make the candy lose its crunch.
- Serve Immediately: While the cake can be stored in the fridge, it’s best enjoyed shortly after assembling the topping for maximum texture contrast.
Presentation and Serving Suggestions
- Clean Cuts: Use a sharp knife dipped in warm water to cut clean slices. Wipe the knife between cuts for a tidy presentation.
- Garnish Strategically: Reserve a small amount of crushed Butterfingers to sprinkle on each slice for a fresh, decorative touch.
- Pair with Ice Cream: Serve with a scoop of vanilla or chocolate ice cream for an indulgent dessert combination.
Storage and Reheating
- Refrigerate Properly: Store the cake covered with plastic wrap or in an airtight container in the refrigerator for up to 3 days.
- Freeze for Later: If you need to store it longer, slice the cake and wrap each piece individually in plastic wrap before freezing. Thaw in the fridge overnight before serving.
Frequently Asked Questions
Here are answers to common questions about making and storing Butterfinger cake.
Can I use homemade cake instead of boxed mix?
Yes, you can use a homemade chocolate cake recipe instead of a boxed mix. Ensure the cake has a similar consistency to a standard boxed mix for optimal absorption of the caramel-condensed milk mixture.
How do I crush Butterfingers without a mess?
Place the Butterfingers in a zip-top bag and freeze them for 15 minutes before crushing. Use a rolling pin or meat mallet to crush the bars while they’re still in the bag, minimizing mess and making cleanup easy.
Can this recipe be made ahead of time?
Yes, Butterfinger cake can be prepared a day in advance. Assemble the cake, excluding the final Butterfinger topping, and refrigerate it. Add the crushed Butterfingers just before serving to maintain their crunch.
How should I store Butterfinger cake?
Store Butterfinger cake in an airtight container or cover it tightly with plastic wrap. Keep it in the refrigerator for up to 3 days. For longer storage, freeze individual slices.
What frosting works best for Butterfinger cake?
Whipped topping like Cool Whip is the classic choice for Butterfinger cake, but you can also use cream cheese frosting, peanut butter frosting, or chocolate ganache for a richer flavor.
Can I freeze Butterfinger cake?
Yes, Butterfinger cake freezes well. Slice the cake into individual portions, wrap each slice tightly in plastic wrap, and place them in a freezer-safe container or bag. Thaw in the refrigerator overnight before serving.
Conclusion
Butterfinger cake is a dessert that combines the best of two worlds: the indulgence of a rich chocolate cake and the irresistible crunch of Butterfinger candy bars. This simple yet decadent treat is perfect for any occasion, from family gatherings to potlucks and celebrations.
With its easy preparation and versatile customization options, Butterfinger cake is sure to become a favorite in your recipe collection. Whether you stick to the classic version or add your own creative twists, this cake will delight candy lovers and dessert enthusiasts alike.
If you’re a fan of candy-inspired desserts, this Butterfinger cake is a must-try! Looking for more chocolatey delights? Try our Chocolate Brownie Cake or the rich Baker’s German Chocolate Cake.